
So as I promised, I have a little video of my entire process of creating Miss Bailey's I have Vocal Cords page I showed you yesterday here.
This is a very simple page, took me all of 17 minutes exactly to make. This is not really an instructional video, it's just to show you my own thought processes when I'm creating a page, but hopefully it will give you some ideas too. This is uncut and raw! LOL So please forgive any rambling. ;)
I'll try to the other one for this week of the artsy page I did also for this photo just to show that process I did.
Credits for Layout: Color Play 2 (to be released Sept 12th)

Showing posts with label Miss Bailey. Show all posts
Showing posts with label Miss Bailey. Show all posts
Weekend Studio Time
Monday, May 14, 2012

I used modeling paste to create the deep textures for the circles applying with a palette knife and applied to a clock stencil I have. (Hind site... next time I'm coloring the background first!) lol We decided we liked the white for the clocks after the fact.
I stuck with lighter tones of color to help lighten the room up, but brought in touches of the browns and ocher colors and there is also a touch of a slate teal blue/green in here too. I loved the way these came out! Not exactly my style, but fits right in with the look Kallie wanted. Modern geometric but with touches of grunge and artsy. Even Miss Bailey got her hands into this with us!
Was a good day!


It doesn't stay clean very long! Playing in the Studio.
Sunday, April 01, 2012
The Art /Sewing Studio back in the loft finally! YEA! Had to close the shutters to take the photo! lol Bright light! But perfect for doing artwork.

Sorry, the bright sunlight drowned out my windows.. I have my antique blue and rose bottles up there and they looked so sweet too.


Within minutes…..
"I'M READY NANA! See... I have my Tim Holtz apron on even!"

So we thought we'd do some canvas art today.
We were inspired by Donna Downey's latest March's Canvas Create project. Yes I'm a member and subscribe and LOVE IT! I don't like pom poms so we made our own rolled fabric flowers instead.
We ripped our strips of fabric to about 1 1/2" wide. I WISH I had Baileys Mama taking a video of this… she giggled so hard doing this ripping she almost fell off the stool! LOL
We used Mod Podge to 'glue' our fabric to our our canvas in strips and wrapped the ends around to the back.
Then began our color mixing with a blue and green and added just a touch of black to get a deep teal shade. We dry brushed the whole piece putting a little heavier coat around edges making sure we stoked up and down to catch the torn fabric edges. Hind site… I almost wish we had not glued the fabric so well and left a little more of the edges loose. Next one. ;) We also added some spray dye to our colors to brighten up the teal-blue we liked and used it directly too as we worked. Home made spray dye from powered Rit Dye very strong.

We rolled fabric roses and made stems from old book pages for our canvas too and tacky glued them down to the canvas. We did paint on the fabric roses with some of the deep red paint we had so it matched perfectly. Just spray the fabric rose with a little water before brushing on the paint to make it soak into the fabric.
 Then we just started to paint and platter and plat colors! We added the deep red to match our flowers with some drippage on the top corner. We like drippage! LOL (as Bailey giggles again as we do.)
We printed one of my fav quotes and Miss Bailey cut that up into strips and glued down again using Mod Podge with a light coating over it so it had a film in case we wanted to wipe any paint off of while we worked. The paper was a little to white for our liking so we added some white washing around the strips to blend it in better and even did a light wash of color over the strips of paper too. Perfect in our opinion. Then we plattered (thank goodness the table was covered in craft paper and we had on aprons! LOL But the craft paper splatters will be added to later and cut up and used in another project I'm sure.
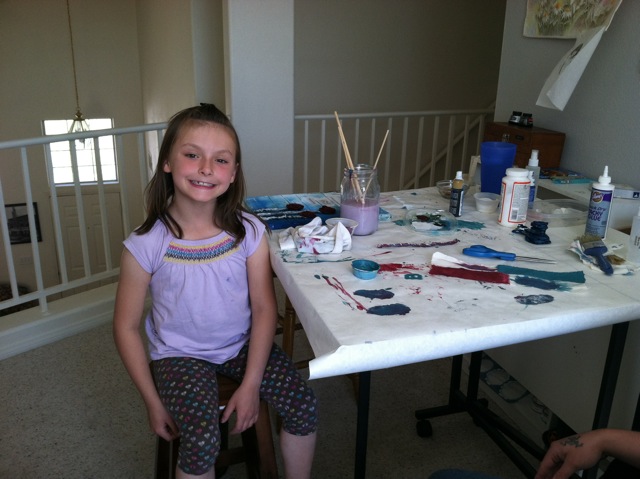
This is my Miss Bailey being so happy we finally got to play in paints again! She of course had to use up all the mixed paint when we were done with our canvas. See the fabric strips in front of scissors? Into the scrap bin they go for another project I'm sure. :)

So this is what we made today. :) Need to take a better photo with a flash. :) The red in the roses is not as dark as this appears. "Hmmmm maybe those flower need a button in the middle?" says Miss Bailey. Kid after my own heart. :) Love buttons!
Should be completely dry and ready to hang when she comes back over tomorrow. :D


Sorry, the bright sunlight drowned out my windows.. I have my antique blue and rose bottles up there and they looked so sweet too.


Within minutes…..
"I'M READY NANA! See... I have my Tim Holtz apron on even!"

So we thought we'd do some canvas art today.
We were inspired by Donna Downey's latest March's Canvas Create project. Yes I'm a member and subscribe and LOVE IT! I don't like pom poms so we made our own rolled fabric flowers instead.
We ripped our strips of fabric to about 1 1/2" wide. I WISH I had Baileys Mama taking a video of this… she giggled so hard doing this ripping she almost fell off the stool! LOL
We used Mod Podge to 'glue' our fabric to our our canvas in strips and wrapped the ends around to the back.
Then began our color mixing with a blue and green and added just a touch of black to get a deep teal shade. We dry brushed the whole piece putting a little heavier coat around edges making sure we stoked up and down to catch the torn fabric edges. Hind site… I almost wish we had not glued the fabric so well and left a little more of the edges loose. Next one. ;) We also added some spray dye to our colors to brighten up the teal-blue we liked and used it directly too as we worked. Home made spray dye from powered Rit Dye very strong.

We rolled fabric roses and made stems from old book pages for our canvas too and tacky glued them down to the canvas. We did paint on the fabric roses with some of the deep red paint we had so it matched perfectly. Just spray the fabric rose with a little water before brushing on the paint to make it soak into the fabric.

We printed one of my fav quotes and Miss Bailey cut that up into strips and glued down again using Mod Podge with a light coating over it so it had a film in case we wanted to wipe any paint off of while we worked. The paper was a little to white for our liking so we added some white washing around the strips to blend it in better and even did a light wash of color over the strips of paper too. Perfect in our opinion. Then we plattered (thank goodness the table was covered in craft paper and we had on aprons! LOL But the craft paper splatters will be added to later and cut up and used in another project I'm sure.
This is my Miss Bailey being so happy we finally got to play in paints again! She of course had to use up all the mixed paint when we were done with our canvas. See the fabric strips in front of scissors? Into the scrap bin they go for another project I'm sure. :)
So this is what we made today. :) Need to take a better photo with a flash. :) The red in the roses is not as dark as this appears. "Hmmmm maybe those flower need a button in the middle?" says Miss Bailey. Kid after my own heart. :) Love buttons!
Should be completely dry and ready to hang when she comes back over tomorrow. :D

Subscribe to:
Posts (Atom)


